Working Deals #
First, you’ll want to choose the Lead Pipeline you intend to work from:
- Sales Pipeline
- Front (Pre-Sale) Which include lead types: Cold Call Leads and Turn Overs
- Inbound
- Renewal / Load

Viewing Your Deals #
You can view your deals in two ways: as a list or a board.
List View #
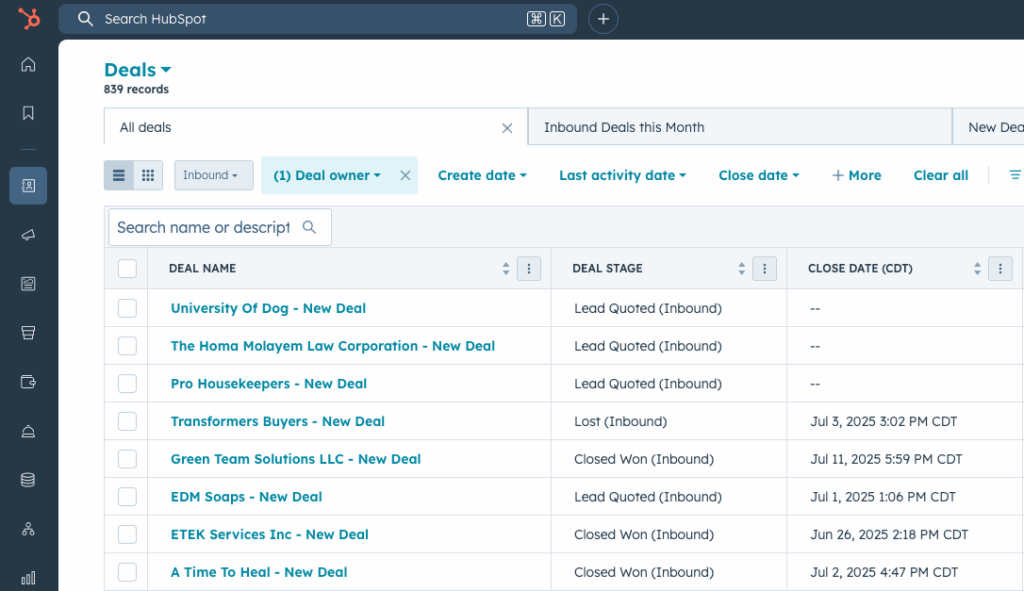
Board View #
In board view, your deals are organized into columns by deal stage.

💡 Tip: If you would like to work from the list view, you can easily filter by deal stage as well. Just follow the steps below.
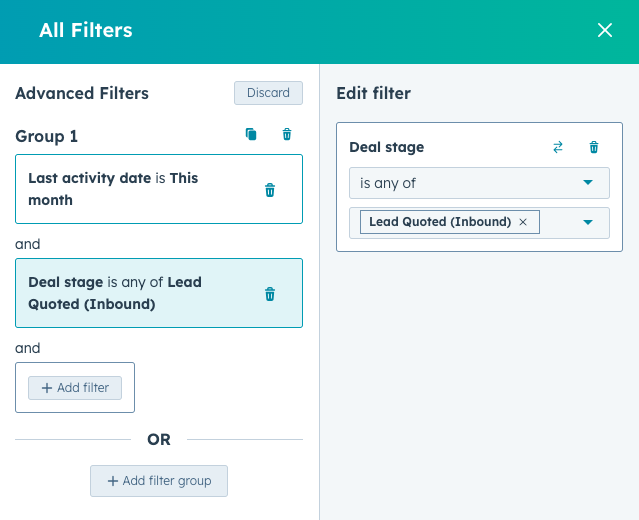
Create a Filter #
- While on the Deals page, click “Advanced filters.”
- Choose a property to filter by, such as:
- Deal stage
- Deal owner
- Amount
- Last activity date
- Create date
- Once selected, you can define the filter logic (e.g., “is”, “is not”, “is after”, etc.).
- Example: Filter for deals where the last activity date is this month.
- Note: You also can combine multiple filters. Just click “+ Add filter.” They work as AND conditions.
- Save your filters
- Click “Save view” in the top left.
- Give it a name (e.g., “Leads Quoted”).
- Make it private.
- Click “Save.”
- Next time, you can select it from the “Saved Views” dropdown.
Create a New Deal #
- From the contacts record, click “+ Add” in the Deals section (upper right-hand corner).
- Fill in deal details:
- Deal name
- Pipeline
- Deal stage
- Deal owner (you)
- Deal type
- Create date
- Close date (if you have one established)
- Click “Create.”
Create a New Contact #
- From the Contacts view, click “Create contact” in the upper right-hand corner.
- Fill in contact details:
- Email address
- First name
- Last name
- Company name
- Original lead type (Cold Call, No Sale, etc.)
- Website URL
- Phone number
- Lead status (In Communication, Open Deal, etc.)
- Click “Create.”
The Contact Record #
The contact record contains all of the basic information and all activities that have taken place to date for your lead.
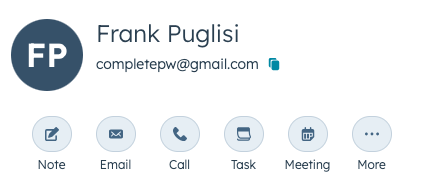
At the top you’ll see their name with a few different calls-to-action.
- Create a note
- Send an email
- Make a call
- Create a task
- Schedule a meeting
Under “More” you’ll find other actions like enroll in a sequence, log a call, or log an email.
About this contact #
This section that you’ll see on the left-hand side of the contact record has all the basic information you need to know about a contact like:
- Original Lead Type (Front, Inbound Phone, Cold Call)
- Name
- Website URL
- Phone Number
- Lifecycle stage (Lead, Opportunity, Customer)
Website Activity #
The last section on the left-hand side is the contact’s website activity. View when their first website visit was as well as their most recent visit to better understand their interest and curiosity.
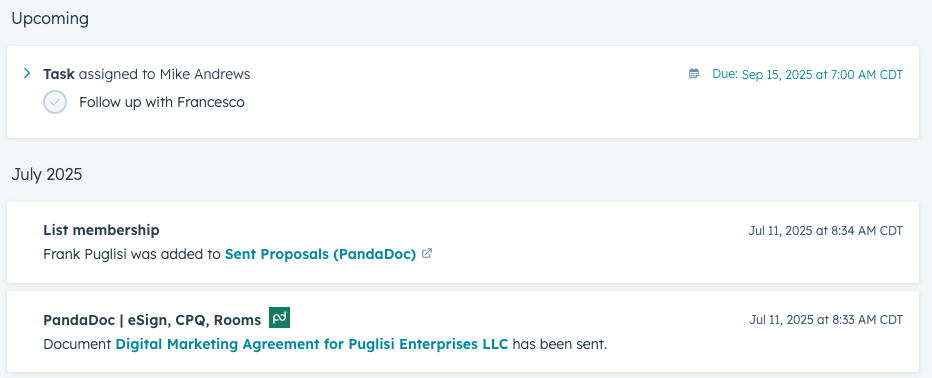
Activities & Overview #
The middle, and largest section of the contact record will contain all activities that have occurred to date with this contact. Every phone call, email, meeting and notated interaction should be recorded here.
Additional Information #
On the right-hand side of the contact record, you’ll find a few different sections that help you keep everything associated with your contact in one place. The following sections are ones you’ll be utilizing most:
- Deals: See any deals, past or current, that this contact has in their name.
- PandaDoc: Find and view any marketing agreements, past or current, that have been sent to this contact.
- Attachments: View all files that are associated with the contact.
- Companies: See the businesses/ organizations associated with this contact.
The Deal Record #
The deal record contains all of the pitch details and activities that have taken place to date on this particular deal.
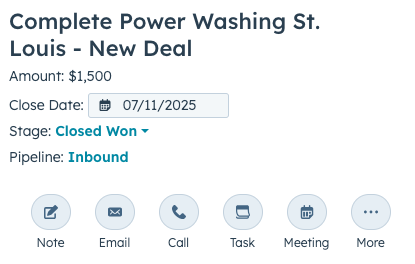
At the top you’ll see the deal name and some basic details:
- Amount
- Close Date
- Stage (Contact Attempted, Quoted, Closed Won)
- Pipeline (Front, Inbound, No Sale)
And just like on the contact record, there are a few different calls-to-action:
- Create a note
- Send an email
- Make a call
- Create a task
- Schedule a meeting
About this deal #
This section that you’ll see on the left-hand side of the deal record has more information about the deal like:
- Services associated with this deal
- Down-payment
- Closed won reason
- Deal type (Renewal, Upsell, No Sale, Cold Call)
Activities & Overview #
The middle, and largest section of the deal record will contain all activities that have occurred to date with the deal. Every deal update, email, meeting and notated interaction should be recorded here.
Additional Information #
On the right-hand side of the deal record, you’ll find a few different sections that help you keep everything associated with this deal in one place. The following sections are ones you’ll be utilizing most:
- Contacts: See all contacts associated with the deal.
- PandaDoc: Find and view any marketing agreements, past or current, that are connected to this deal.
- Attachments: View all files that are associated with the deal.
Connect Calendar to HubSpot #

- Click the “Settings” icon in the top navigation bar.
- Click “General” in the left sidebar under Your Preferences.
- Click the “Calendar” tab at the top of the page.
- Click “Connect your Calendar.”
- Choose Microsoft Outlook.
- Review permissions and then click “Yes” to finish connecting to your calendar.
You’ll be redirected to the meetings dashboard where you can manage your settings.
HubSpot Sales Outlook Extension #
This should already be installed on your computer. If not, please reach out to the IT department and they will install this for you.
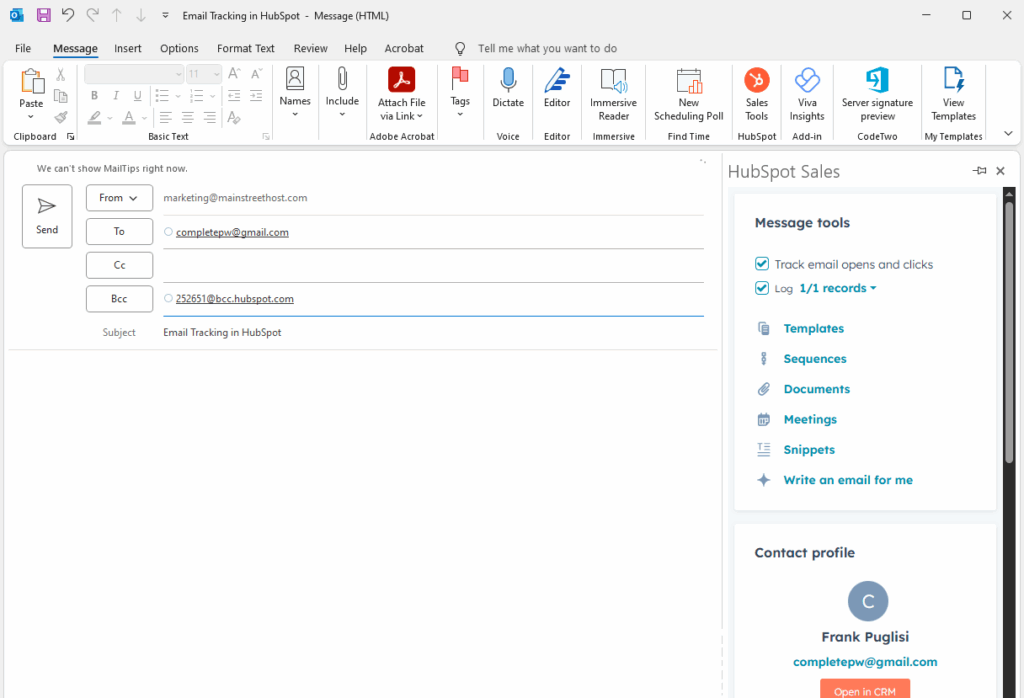
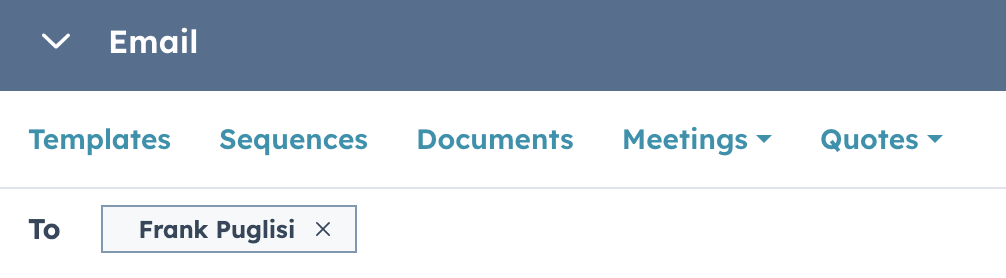
How to Send an Email to a Contact #
From Outlook:
- Create a new message.
- Add a subject line and write your message, including any necessary images or attachments.
- Click on the “HubSpot Sales Tool” In your top navigation bar.
- Check the boxes:
- Track email opens and clicks
- Log 1/1 records
- Click “Send.”
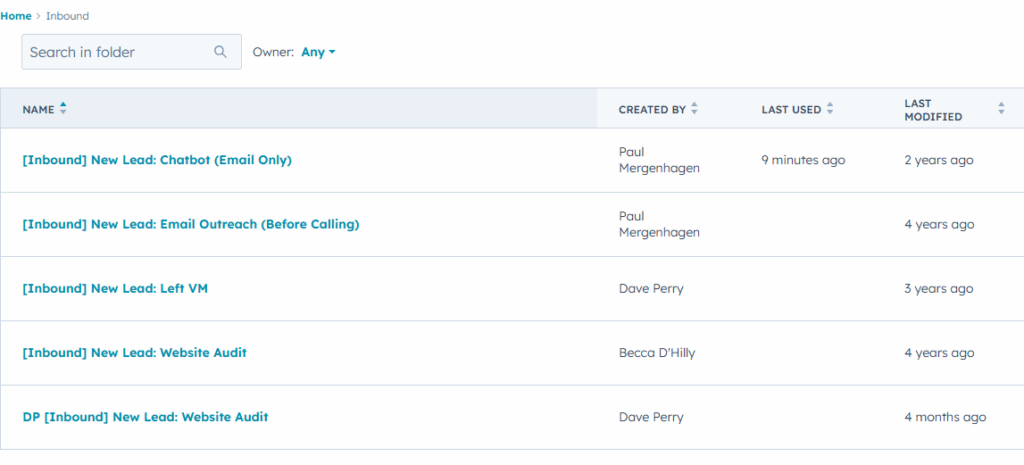
This is also where you can utilize our company’s pre-made email templates and sequences.
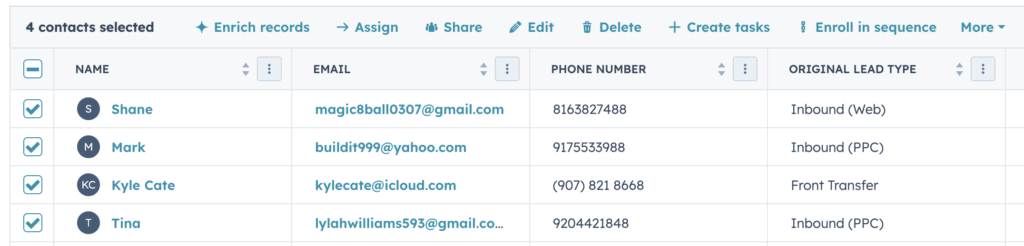
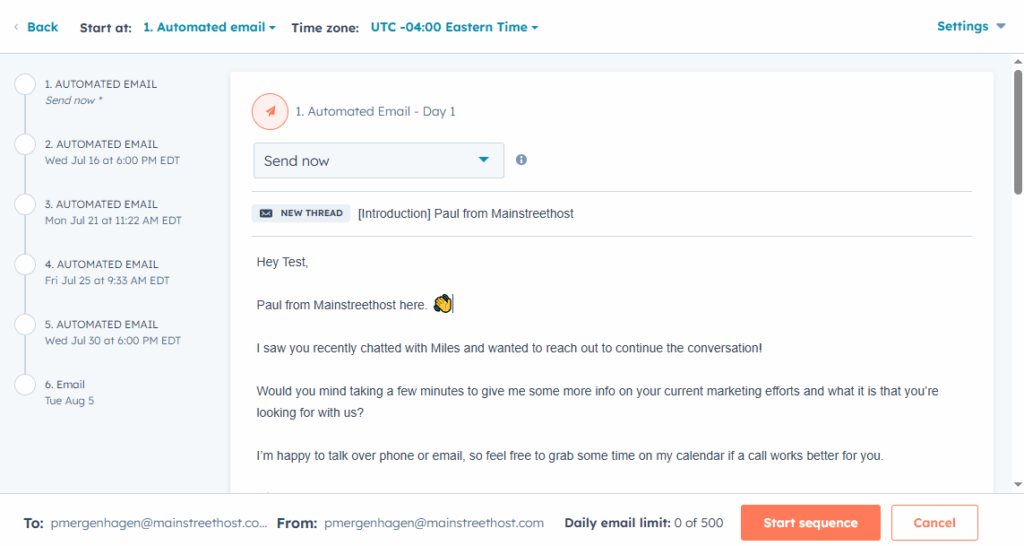
How to Enroll a Contact in a Sequence #
You can enroll individual contacts or bulk enroll multiple contacts. And there’s a few different ways you can do so from:
- An individual contact’s record
- The main contacts view (used for bulk enrolling)
- Outlook using the HubSpot Sales extension
An Individual’s Contact Record #
There are two ways to enroll from the contact record.
1. Click “More” and choose “Enroll in a sequence.”
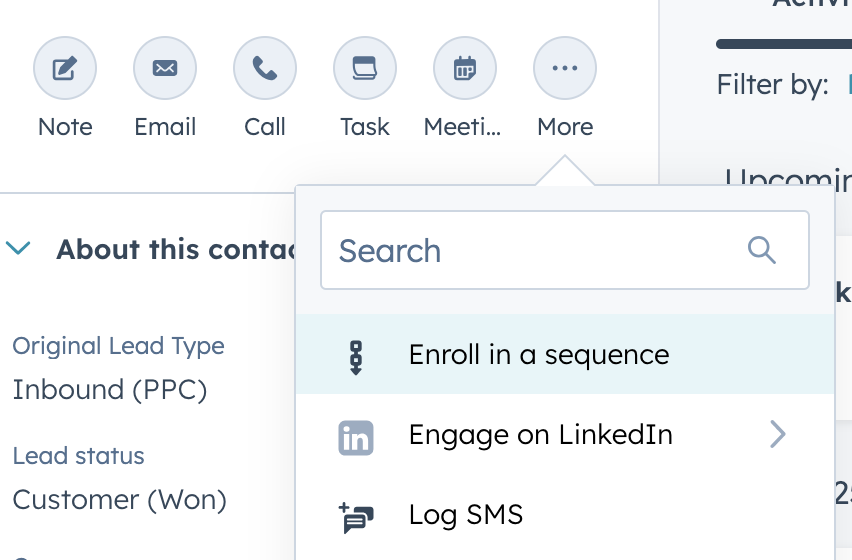
2. Click “Email” and choose “Sequences.”
The Main Contacts View #
Select the contacts you want to bulk enroll and then click “Enroll in sequence.”
Outlook #
- Create a new message.
- Click on the “HubSpot Sales Tool” In the top navigation bar.
- Check the boxes:
- Track email opens and clicks
- Log 1/1 records
- Click “Sequences” and choose from our library.
- Review and edit all emails in the sequence.
- Ensure all contact information is correct
- Add any necessary additional information to better tailor your message
- Click “Send.”
How to Create a Task #
You can create tasks directly on a contact or deal record.
- On the left-hand side, click “Task.”
- Enter a title for your task. (Call, email, check in)
- Select an activity date and time.
- Select a task type: Call, Email, To-do.
- Add any notes you may need.
- Click “Create.”
How to Schedule a Meeting #
You can schedule a meeting with a prospect or customer in a few different ways. From:
- An individual contact’s record
- Outlook using the HubSpot Sales extension
An Individual’s Contact Record #
- On the left-hand side, click “Meeting.”
- Enter a title for your meeting.
- Enter a start date.
- Enter a start time and an end time.
- Click the “Attendees” dropdown menu to ensure the correct contact is included. Here you can select other contacts or team members that should be included.
- Click the “Location” dropdown menu and select the correct option for your meeting—most often it will be a phone call.
- “Add a reminder” so a scheduled email goes out before a meeting.
- Add an “Attendee description” with details about the meeting. All attendees will be able to see this description.
- Add “Internal notes” with any important information that could be helpful to you or other team members. The contact attendees will not be able to see this info.
- Click “Save.” The contact will receive a calendar invite.
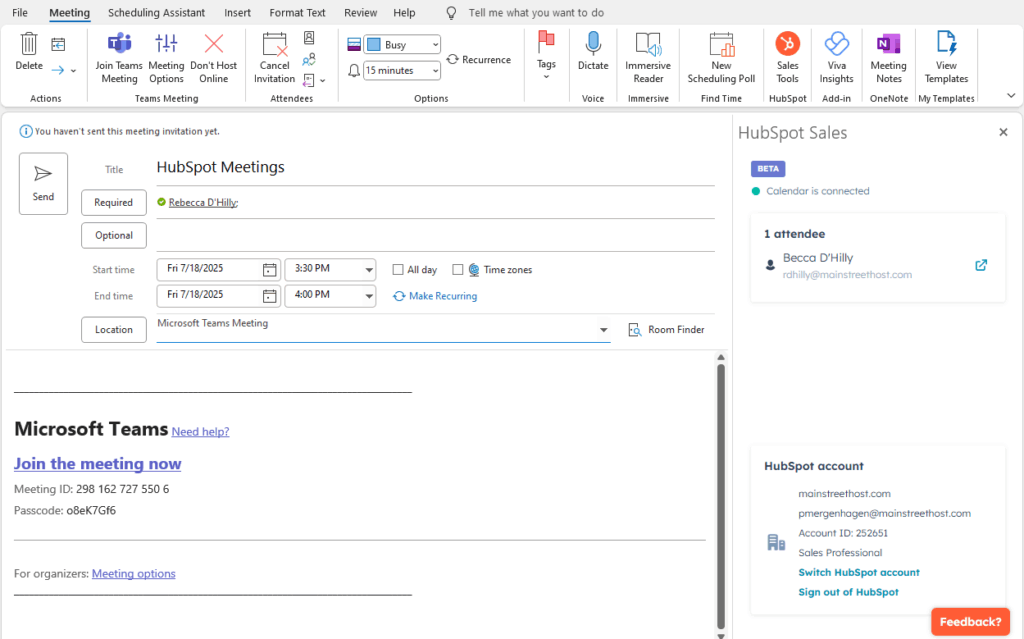
Outlook #
- Navigate to your calendar.
- Ensure your HubSpot Sales Tool is open.
- Click on the day you would like to schedule a meeting for.
- Enter a title for your meeting.
- Enter a start time and an end time.
- Review attendees to ensure the correct contact is included. Here you can select other contacts or team members that should be included as well.
- Add a description with details about the meeting. All attendees will be able to see this description.
- Click “Send.” The contact will receive a calendar invite.
How to Log a Call #
Some activities are logged automatically in HubSpot, but it’s important to manually log your phone calls in order to keep a complete record of outreach and engagement.
You can log a call on a contact or deal record.
- On the left-hand side, click “More.”
- Click “Log a call.”
- Select the date and time the call occurred.
- Select the call outcome.
- Add your notes and any important information from the call.
- Click “Log call.”
Activity Requirements to Maintain Your Leads: #
Initial Contact Within the First Hour #
Any newly assigned lead must be contacted within the first hour. If this does not happen, the lead will be moved (excluding weekends).
Activity During the First Week #
During the first 7 days after a lead is assigned, there should be activity on a daily basis. Activity means sending emails, logging phone calls, or scheduling tasks/ meetings for the future.
If there is no documented activity or notes in HubSpot in any 24-hour period during these 7 days, the lead will be moved (excluding weekends).
Weekly Engagement #
After the initial 7-day period, there should be at least one documented activity or future task in HubSpot each week. If there is no weekly engagement or scheduled activity, the lead will be moved.
Notes in HubSpot #
As you are working inbound leads, please leave detailed notes on the contact record in HubSpot about the sales activities you’ve engaged in, along with status updates about the contact.
Leaving detailed notes not only provides a history of activities for your reference, but also serves as the primary method our teams use to manage our lead follow up.
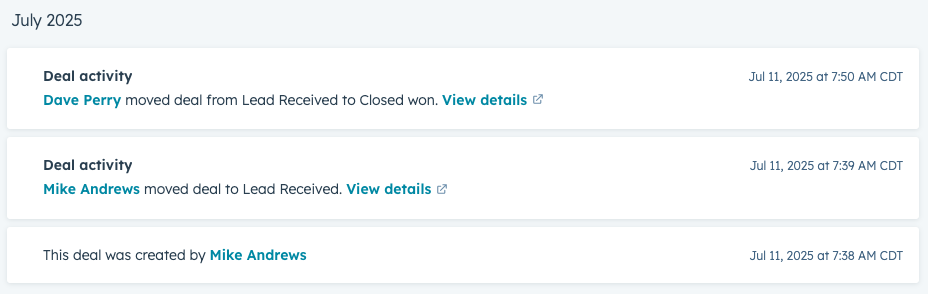
To emphasize this point: You must leave a note and advance the deal stage of the contact accordingly when working leads
It is your responsibility to ensure that HubSpot is updated to reflect all calls and contact attempts made. We will not rely on Vonage call records to verify whether you have contacted the lead or not. Failure to do so will result in the contact being reassigned.
Customer Service Issues: if at any time a customer requests not to work with or has a complaint about an Account Manager, their supervisor will be notified, and the account will be reviewed to determine if the request was valid. If the deal was already processed, commission will be paid to the Account Manager who sold the deal. If the request was valid, the account will then be moved to whomever we deem the best fit. No future commissions will be paid to Account Managers who have been removed from the account unless prior arrangements have been made.
Deals and leads will be moved if procedures are not properly followed.


